


When you take into account its purchase price and all of the consumables it requires–toner or ink, paper, imaging drums, and more–you may find that a printer is one of the most expensive pieces of IT equipment in your business.
When any one user needs access to an expensive machine only intermittently, sharing the hardware among as many users as possible makes sense. The simplest way to accomplish this in an office is to put the printer on the office network, where all network users can reach it.
There are three basic approaches to putting a printer on a network. The first is to use a printer that has networking capabilities built in. The second is to attach a printer to a separate network endpoint (a dedicated print server) that may or may not have additional features. And the third is to attach the printer to a computer workstation and share it with other network users.
Each of these methods has its own advantages and disadvantages, and each works best under specific circumstances.
Connecting a Network-Enabled Printer
The easiest type of printer to connect is one that comes with a network adapter already installed in it. If your network architecture is simple, you can have a peripheral of this type printing across the network in a matter of minutes.
If every computer in the office or home network resides in the same network space (that is, if the first three triplets in the xxx.xxx.xxx.xxx IP address are the same for each machine), setting up printer sharing is quite simple. If different subnetworks exist (so that only the first two triplets are the same for every computer) the task is more complicated–but in such a case, your business probably also has a dedicated IT staff.

You can add standard printers to a network with dedicated print server.Often the product description accompanying printers equipped with preinstalled network adapters includes the words “network printer” or “network capable.” Many printer manufacturers signal that the printer is network-ready by including the letter “n” somewhere in the model name. The network connection provided may be cable-based or wireless. Either method of data transfer will be faster than the speed at which paper can come out of the printer, so the method has no significant impact on printer performance. Network-enabled machines may be inkjets (such as the Epson B-510DN and the HP OfficeJet Pro 8000 Wireless) or lasers (such as the Dell 5130cdn and the HP CP4025dn).
The precise process for setting up a network printer for operation varies from printer to printer, but in every case a couple of basic steps must be completed.
The first is to decide whether to assign the printer its own static (never-changing) address on the network or to allow the network’s Dynamic Host Configuration Protocol (DHCP) server to assign it an address, as it does for all the desktop and mobile clients on the network.
If you decide to accept DHCP, you’re likely done with the printer’s network setup. If not, you must ensure that the network address you assign to the printer isn’t already assigned to any other device, and won’t be assigned by DHCP. This generally means choosing an address high in the range of available options–say, 200 or above. (xxx.xxx.xxx.200). If you don’t know which addresses have already been assigned on your network or what range the DHCP server uses, you’re almost certainly better off letting DHCP handle address selection for you.
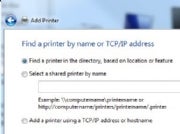
Connect to network printers from the Windows Control Panel. Once the printer is online, you can begin connecting to it from various workstations. In XP, Vista, or Windows 7, the process is similar to the one for establishing a direct printer connection. In the Control Panel, choose Printers, Add New Printer, Network Printer, and then allow the wizard to browse for printers.
You should see the new printer in the list that Windows provides, probably with a name indicating its brand and model number. If you were able to select a name in the printer options while setting up the printer, you’ll see that name. Select the printer name and click add. The operating system will select the proper driver from the list of installed drivers, and you’ll be ready to print.
If you don’t see the printer identified in the browser wizard, check the computer’s firewall settings. If you ratchet up a computer’s security settings too high, the system won’t permit the traffic necessary to discover and report on printer status. If this happens, you can temporarily lower the firewall settings to a more permissive level, install the printer, and raise the security settings to their previous high level.
Using a network-capable printer is the simplest way to make printing available across your network. Though the cost of network capability has come down, it does add to the purchase price of the printer, and–depending on the printer–it may encourage broader use of more-expensive print services, such as color printing.
These days, most printers that don’t have a built-in networking capability are holdover printers from years past, multifunction devices like the Canon Pixma MX7600, or high-quality photo printers like the Epson Stylus Pro 7900.
A print server makes a non-network-capable printer accessible from any computer on the network. The printer connects to either a parallel port or a USB port on the server; another port on the server connects to the network. Network print servers range from simple, single-USB devices that cost less than $100 to multiport, multifunction systems that cost $1000 or more.
Typical low-end, print servers are the NetGear WGPS606 and the D-Link DPR-1260; representative high-end models include the HP JetDirect EW2500 and the Edimax PS-3103P. In addition, Iomega sells network-attached storage (NAS) devices that include print functions.
The proper way to set up the server depends on the device’s complexity and on the particular functions that the manufacturer built into it. But all setups have a common result: After the print server is set up, the printer will be visible to workstations just as if it were a network-capable printer.
Print servers offer a low-cost way to expand access to an existing printer. If your workplace doesn’t require advanced features such as print-job logging and first-page divider printing on jobs, a simple, inexpensive print server is probably all you need. If your office would benefit from more-sophisticated accounting and user-customizable features, you’ll have to weigh the cost of a higher-end print server against the value of those additional capabilities.
For Linux users, the process for sharing a printer or attaching it to a network printer will vary depending on the Linux distribution in question, but it should be a simple wizard-driven process for Ubuntu and Red Hat users.
Standard Printers Shared From a Network-Connected Computer
 The third way to make a printer available via an office network is to make a printer connected to a specific computer available for other users to share. To set this up on the computer directly attached to the printer, first go to the Windows Network and Sharing Center. Next, confirm that the workgroup name is correct (unless the computer is part of an Active Directory domain, in which case the Active Directory server will handle naming details), and choose Printer Sharing. Click the down arrow next to the label, and then click Enable Printer Sharing and Accept.
To gain access to a printer shared from a computer, open the Network view in Windows and double-click the icon for the computer that hosts the printer. You should see an icon for the printer that is set up for sharing; right-click the printer and choose Connect. Now you’re ready to use the hosted printer.
On a Mac system, go to System Preferences, select Print and Fax, and click the plus sign at the bottom of the printer list to add a printer. Check the box for Share this printer across the network to activate printer sharing. If you want to share a printer between Windows and Mac computers on a network, you must first make sure the two types of computers can see one another.
The advantage of this third method of sharing a printer is that it can make an existing device far more accessible than before. The disadvantage is that the printer ceases to be available if the host computer is turned off or away from the office. If your organization has older surplus laptops or workstation computers, you can use them as dedicated print servers–a very low-cost way to maximize printer access.
At the simplest level, you can attach a printer to a computer, share the printer on your network, and never turn the computer off. It does nothing but share the printer. If you want more control and greater functionality, you can use software such as HSLab Print Logger SBE ($190) to maintain records of which users print how many pages, to limit accounts, and to do many other things.
Network printer sharing isn’t the answer for every printer or every office. Some work functions, such as accounting and human resources, may require a dedicated printer that’s unavailable to the rest of the organization. For most job functions, though, a shared network printer can make more-advanced printing available at lower cost to a wider range of employees. That’s a bottom-line win for everyone.
Source: PCWorld.com
