


Research In Motion (RIM) is to mobile e-mail what the late Heath Ledger is to fictional super-villians. In fact, RIM’s known throughout the smartphone space as the clear leader in e-mail management, and that’s due in no small part to its industry-leading “push” e-mail technology.
Push delivers messages to users’ BlackBerry inboxes almost instantaneously after they hit corporate or personal mail servers, as opposed to fetching messages at pre-set intervals.
BlackBerry E-Mail Signature
But RIM’s impressive reputation can also be attributed to the wide range of desktop-e-mail-like features it provides, including the ability to create and assign unique bits of text, or signatures, to e-mail boxes, so that text can be distributed along with every message sent.
E-mail signatures appear at the end of messages, and they commonly include the sender’s name, address and relevant contact information.
But you can also employ signatures to send a message–“I’ll be away all next week, so get in touch today if you need me,” for example–or as a warning that you’re using a BlackBerry, and as such, your messages could have an inordinate amount of typos.
I typically target advanced BlackBerry owners, or power users, with my weekly BlackBerry Tips and Tricks. I’ve covered everything from backing up your BlackBerry and maximizing on-board memory and device battery life to installing and removing third party apps.
This week, you don’t have to be an expert to follow my BlackBerry e-mail auto-signature tutorial, starting with personal, Web-mail auto-signatures for BlackBerry Internet Service (BIS) accounts and moving on to corporate, BlackBerry Enterprise Server (BES) mailboxes.
1) BlackBerry Personal E-Mail Auto Signatures: BlackBerry Internet Service (BIS)
To create, change or do away with an auto signature for a BlackBerry Internet Service (BIS) Web-mail account, you first need to log in to your wireless carrier’s website–you may also need to create a new account if you haven’t already. To do so, surf over to your carrier’s website and either create a new user name and password or login to an existing account.
After logging into your carrier’s website, you should locate the BlackBerry messaging, or BIS, section of the page. (You can also quickly find your carrier’s BIS page by performing a Google search for the carrier’s name and “BlackBerry Internet Service (BIS).”) Once on the BIS page, create at new account, if necessary, or login.
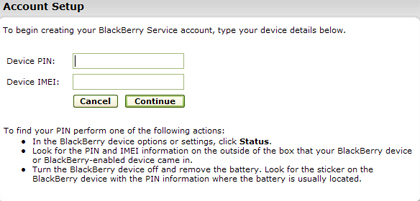
BlackBerry Internet Service (BIS) Account Creation Page
Next, you can choose to add a new Web mail account to BIS, or if you’ve already added one, there’s an option to edit existing accounts. If you’ve not yet created an account, follow the on-screen process to enter an e-mail address and login information, then save your changes. Once an account is added, you’ll be returned to the main BIS page.
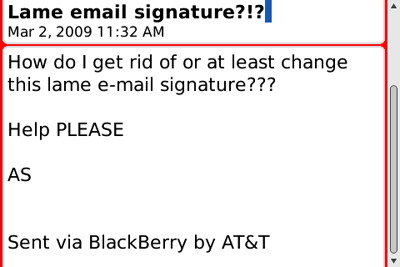
A default e-mail signature will be assigned to each new BIS e-mail account you add, something like: “Sent via BlackBerry by AT&T.” Until you physically remove this default auto-signature, it will appear at the bottom of each and every message you send.
This is a good way to spot newbie BlackBerry owners, as many beginner users aren’t even aware that the signature is there.
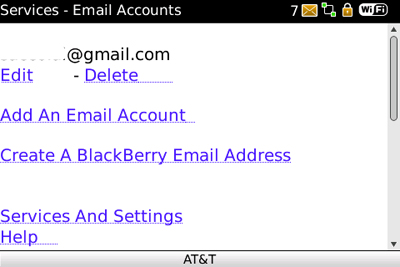
On-Device BIS Settings
To remove, edit or create a new BIS e-mail auto-signature, login to your carrier’s site, locate the BIS page and click the Edit option below the e-mail account you wish to modify. On the following page, you’ll see an e-mail signature option with a space for text beneath it.
If you’ve never modified your BIS account, you’ll see the default signature mentioned above, within that space. You can delete it completely, modify it or create a new signature. Once you have, click the Save button.
After you’ve got your signature the way you want it, return to the main BIS page and click the link that says Send Service Books. This helps to ensure that your changes are applied.
2) BlackBerry Corporate E-Mail Auto Signatures: BlackBerry Enterprise Server (BES)
The easiest way to create or modify BlackBerry e-mail auto-signatures for corporate or BlackBerry Enterprise Server (BES) accounts is via your handset and not a Web-based interface, like the BIS interface described above.
Also, BES mail accounts do not have any sort of default signature applied, so unless you create one yourself–or an admin does it for you–your BlackBerry mail will not have an auto-signature.
On-Device E-Mail Settings
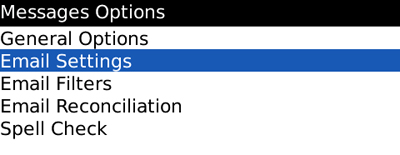
To create or change a BES e-mail auto-signature, you should first open your on-device Messaging app, where all of your BES messages are stored. Next, hit the BlackBerry Menu key–which is located directly to the left of your trackball–and scroll down until you can click on Options. Within the Messages Options menu, choose E-Mail Settings.
On the following E-Mail Settings page, make sure the Use Auto Signature option is set to Yes, and then fill in whatever message you want to appear at the bottom of your e-mail, within the blank on-screen box.
As mentioned earlier, common BlackBerry e-mail signatures include name, address and contact information, but you may also wish to use something to alert message recipients that your mailing was sent via BlackBerry. For instance, “Please excuse any typos. Message was sent via BlackBerry.”
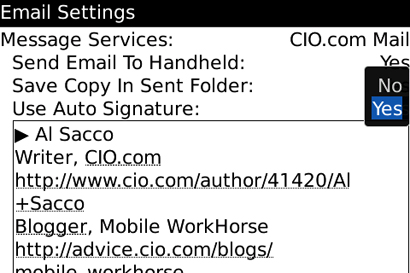
On-Device BES E-Mail Settings
Finally, hit the BlackBerry Escape key to the right of your trackball to exit the screen, and then save your changes when prompted.
You can also add or change your BES e-mail signature using RIM’s BlackBerry Desktop Manager software, though you need to have chosen the enterprise e-mail option when you first used Desktop Manager. If you’d like to employ the software to modify your BES auto-signature but don’t have the corporate mail option in Desktop Manager, simply uninstall the app, then reinstall and choose the enterprise setup option.
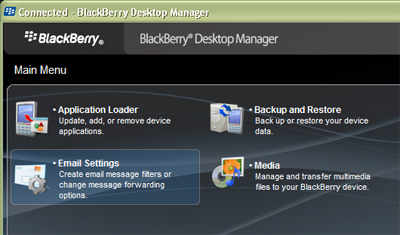
BlackBerry Desktop Manager Main Page
Next, connect your BlackBerry to your PC via the standard mini USB cord and fire up Desktop Manager. You should see an E-Mail Settings tab on Desktop Manager’s opening page. If you do not, you need to uninstall and reinstall the app, as previously mentioned.
Click E-Mail Settings and add whatever text you’d like to use as an auto-signature to the blank on-screen box. When you’re done, just hit the Apply button and close the program.
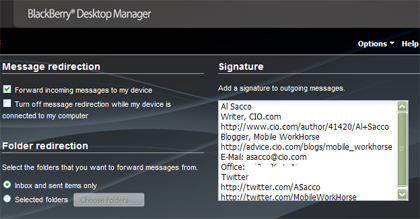
BlackBerry Desktop Manager E-Mail Settings
Finally, you need make sure that you have set your device to employ a BES e-mail auto-signature. To check this, follow the process described at the start of this section and make sure the Use Auto Signature option on the on-device E-Mail Settings page is enabled.
Source: CIO.com
