


Traffic lights are everywhere aren’t they? No matter where you go, or how deserted the place is, the ubiquitous evil devices make their presence known, and for David Cousens, they always seem to stop him when there’s nobody else on the road!
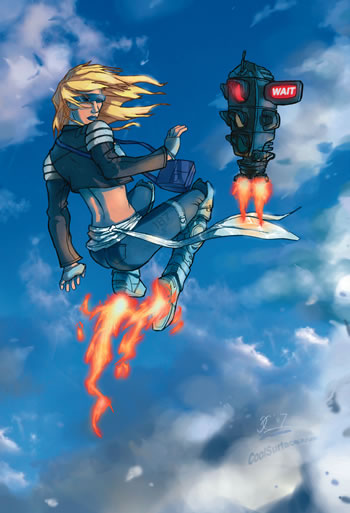
Not only will this tutorial expose their insidious plan, it will also show you how to create a stylized image starting from old school pencil and paper and then develop it into a finished piece in Photoshop.
See also: Free photo, video and Web editing tools that make you look like a pro
For this tutorial, you will need a graphics tablet and also some Prismacolor col-erase pencils if you want to follow the tutorial from the first step.
If your drawing skills aren’t too hot, the lines for Air Traffic Control are provided as a JPEG for you to work with on the cover CD. Aren’t we nice?
Step 1
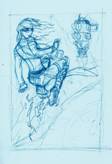
Start with a plain sheet of paper and a Prismacolor col-erase blue pencil. The benefit of using a col-erase pencil is that you can use it to draft your lines and rub them out easily.
We’re going to use Photoshop to make the blue lines invisible later, so you can draw loads of construction lines and be as messy as you like here!

Step 2
When you’re happy with your sketch, take your pencil of choice (We’d recommend a mechanical pencil no more than 0.5mm thick) and start to make your finalised lines.
Unlike the last step, this is where you should be precise and make only lines that you’re happy appearing in the final image. Ensure the lines are opaque as this will help later in the tutorial.
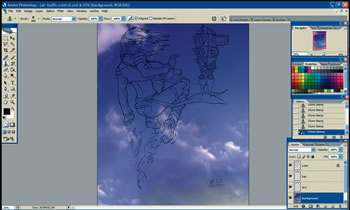
Step 3
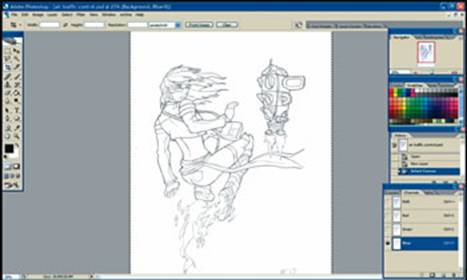
Time to get rid of those blue lines. Scan in your image in RGB at 300 dpi (or open it from the cover CD). Double- click the background layer to make it a layer. Make a new layer above this layer. On the original artwork layer, press Ctrl + A to select the canvas and click on the channels tab in the Layers palette.
Click on the blue layer so it is the only visible layer and then hit Ctrl + C to copy it. Click on the Layers tab and go back to the new layer. Hit Ctrl + V to paste.
Step 4
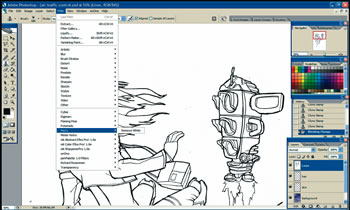
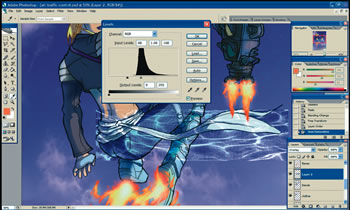
Now you’ll be left with black lines that you need to make darker. Press Ctrl + L to alter the levels, then drag the black triangle slider to the right, just halfway before the first peak. If your scanner has picked up noise, you may need to drag the white triangle slider to the middle of the right peak.
Run Mack’s Remove White filter (www.photoshop-filters.com/html/macks.htm). With the white pixels transparent, click lock transparent pixels in the layers palette and name the layer ‘Lines’.
Step 5
Make some new layers called ‘skin’, ‘hair’, ‘clothes’, ‘blends’ and ‘background’. Place them all underneath the ‘Lines’ layer.
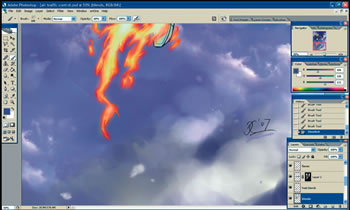
Normally we’d recommend filling the background layer with a neutral colour to give you the feel of the picture and because you should never colour against a white background, however, considering this image takes place in the sky, drop an appropriate photo of the sky into the layer.
If you don’t have any photos, there are many royalty-free image sites out there; we’d recommend www.imageafter.com and www.mayang.com/textures
Step 6
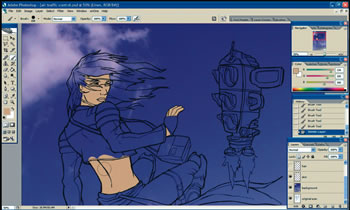
A lot of tutorials suggest filling each section of an image with a flat colour on its own layer at this stage, but this can be very dull, so we’re going to break it up a bit and shade each section as we go.
To block colours in, use a round hard-edge brush with the following settings: Opacity and Flow: 100 per cent, spacing 1 per cent, size jitter set to Pen pressure, angle jitter set to pen tilt, with airbrush and smoothing ticked. Pick a suitable skin colour and fill the area on the ‘skin’ layer.
Step 7
While holding Ctrl, click on the thumbnail of the skin layer (found in the layers palette) to make a selection. Now click on the ‘blends’ layer and using the same brush, this time with a blue colour, add shading for the skin.
Almost all of the shading for the image will be done on the ‘blends’ layer because it will save on file space and give you the option of altering the base colours. Repeat this procedure for each element of the image; clothes, hair, and so on.
Step 8
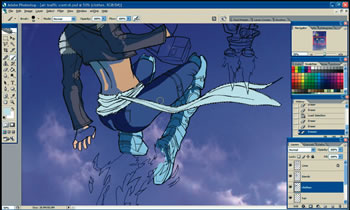
When you get elements that will overlap each other, such as the sash and the boots here, don’t waste time by trying to carefully shade while avoiding the other element, simply shade the boots as you would normally, then Ctrl click the layer the sash is on to select it, then on the ‘blends’ layer press Backspace to remove the shading from the sash selection.
Step 9
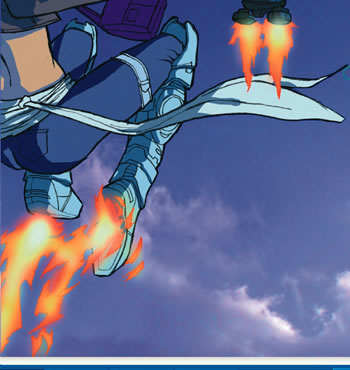
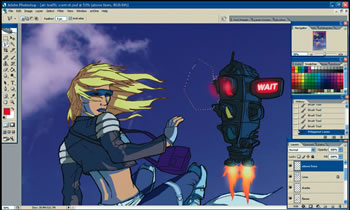
Because we locked the ‘Lines’ layer earlier, you can now colour the lines by simply using your brush, you will only affect the black pixels. Pick a dark red for the outline of the flames from the boots. Create a new layer below ‘Lines’ called ‘Flames’ and colour the flames orange.
Create a new layer called ‘Above Lines’ and switch to an airbrush set to mode: screen and 60 per cent opacity. Pick a light yellow and colour the inside of the flame, use repeated strokes to get a whiter colour. Use a hard edge brush for extra detailing in the flame.
Step 10
On the “Above Lines” layer press L and use the Polygonal Lasso tool to select an area that the left hand red light should bleed into while blocking off the area into each other when you use the airbrush for the lights glow.
Step 11
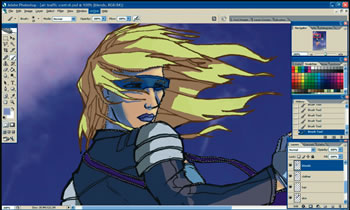
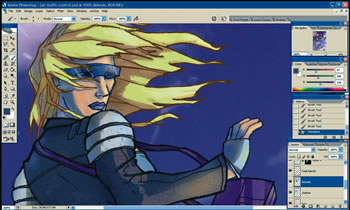
Now to enhance the shading. Select each area in turn by Ctrl-clicking them and use the airbrush to simulate radiosity by lightly smoothing the edges of the shading. Also using the airbrush, start to add ambient colours, such as a faint blue on the girl’s hair, jacket, and trousers.
Step 12
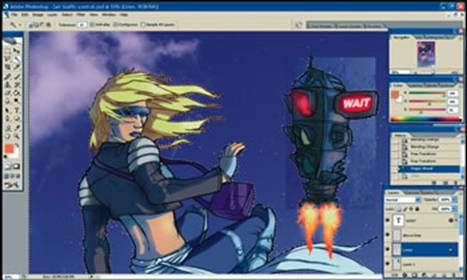
To make the traffic lights look like they’re made from a different material, paste a stone texture (www.mayang.com/textures) and set the blending mode to soft light, then free transform it (CTRL + T) so it only covers the traffic lights.
To remove any excess texture, use the magic wand tool on the ‘Lines’ layer to select the area outside the traffic light, then hit backspace on the texture layer.
Step 13
To add the pattern to the sash, paste in a photo of a swimming pool floor, setting the blending mode to ‘overlay’ then adjust the levels (Ctrl + L). Add a layer mask (the small circle in a square icon at the bottom of the layers palette) using a solid black brush to hide any unneeded details.
Step 14
Press B to select the airbrush. At 60 per cent opacity, paint some clouds to integrate the girl with the picture more. Pick a dark grey colour for the base of the clouds and block in where you’d like to place the clouds. Then pick a series of lighter colours and build them up, using the Alt key to keep colour picking new colour variations.
Remember the contrast of the clouds should be greater the closer they are to the foreground. Use the [ and ] keys respectively to decrease/increase the size of your brush.
Step 15
Finally, make everything look a bit more real and gritty by using a variation of texture brushes at 60 per cent opacity (the excellent artist Thierry Doizon has some you can download at www.barontieri.com/atelier.htm).
Try to think about what sort of texture would be on each material – textures on the skin would be much more subtle than the jacket, for example. Then take one last look to make sure there aren’t any mistakes, and you’re done.
Source: Digital Arts
