


Cut-&-paste montages in Photoshop are probably the first creative exercise new pixel jockeys do, after cut-outs and colour conversion. And while it can be a quick process to seamlessly blend a multitude of images together, there is a real knack to using them to build up a creative landscape.

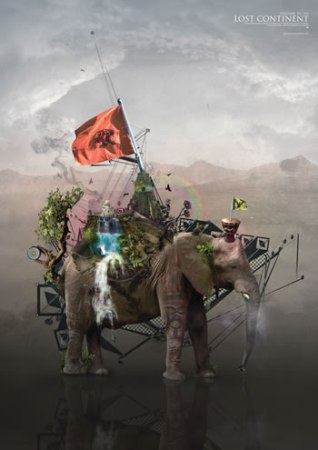
In this masterclass, designer and illustrator Mike Harrison has created a surreal digital scene using layer effects, vector masks, and the liberal use of dodge and burn tools in Photoshop. The result is a fantastic, genre-defying montage that shows that you can take cut-&-paste to new heights.
Related stories
Photoshop turns 20 – How the Adobe app has changed our lives
Adobe Premiere Elements 7 and Photoshop Elements 7
How to create stunning retro art with Photoshop and Illustrator
How to create an eye-popping Twitter page in Photoshop
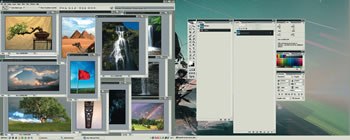
Step 1
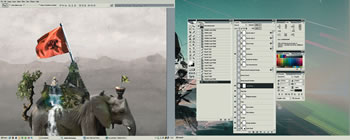
Because this piece is very stock heavy, gather a possible collection of images first and put them in a folder. This will save you time searching for images while creating the piece and will keep your creativity flowing. Don’t worry about collecting every single image you wish to use because you will most definitely think of more along the way. Now create a new A4 document at 300dpi resolution.
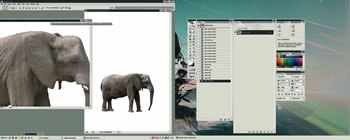
Step 2
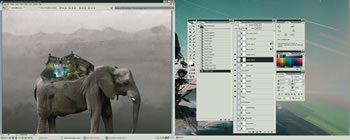
Now open the elephant.jpg, select the pen tool and carefully create a path around the body. We will be putting in objects on top and behind it in detail, so cutting it out is important. Once finished, double-click the background layer to unlock it, then right-click the path and select Create Vector Mask. Then drag the elephant into the new document and position it somewhere in the bottom half.
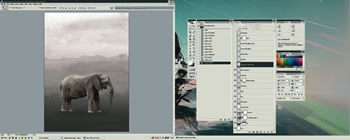
Step 3
Now find some earthy textures and some landscape images that can be used for the backdrop – forests and paper textures work well. We are aiming to blend these images into one nice background, so play around with blending modes, and you may want to create a couple of adjustment layers.
For example, Layer > New Adjustment Layer > Hue/ Saturation or Levels to get the desired look. After that, select a soft brush with size from 100300, create a new layer and add shadow underneath the elephant and around the feet.
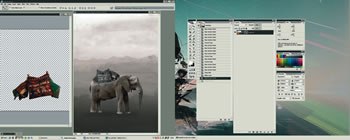
Step 4
As a base for the lost continent, open the file camel.jpg and use the pen tool to cut around it. Then Right- click > Create Vector Mask and drag it into our main document. Flip the backpack horizontally and position it on the elephant’s back.
We need to do some colour correction on this to blend it in more, so go to Image > Adjustments > Hue/saturation and bring the saturation slider right down to almost black and white. Then select a combination of the dodge and burn tools with large soft brushes and highlight or darken areas for more realism.
Step 5
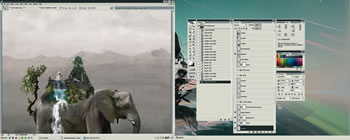
The next step is to add some greenery onto the backpack and on the elephant itself. Gather together some images of foliage, such as bushes and trees, and put them into the document. Now, for each layer go to Layer > Layer Mask > Reveal All, and grab a soft brush with a flow of aro
und 25 per cent.
Erase the parts you don’t want and blend them in as well as you can. Open moss.jpg and place it over the elephant’s stomach and face and use the same technique so it looks like moss is growing there.

Step 6
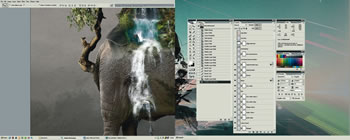
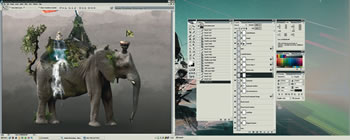
This piece includes a large water feature, so open the file waterfall.jpg and drag it into the document. Create a layer mask and begin carefully erasing parts until you are happy. You will need to use brush sizes from very small to about size 100, with varying hardness to achieve a decent integration with everything. You can also add some fish that appear to be jumping out of the water, so find an image, cut it out then position and rotate it down to the bottom of the waterfall.
Step 7
It’s time to give this elephant a tail, so open bonsai.jpg and using the pen tool again, cut it out and place it into the document. Rotate it 90 degrees clockwise then flip it horizontally and give it a layer mask. Then erase just a small part of it so it blends in with the elephant nicely. Then create a new layer and brush onto the elephant to create the shadow from the bonsai.
Step 8
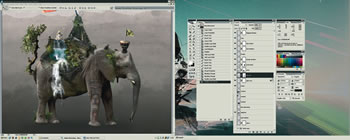
A continent wouldn’t be complete without some sort of temple or buildings, so we are going to add a palace and an old temple on the backpack. Find a couple of images you like of temples or palaces, cut them out with the pen tool and drag them in. For the temple we need to add a subtle shadow in front of it, so create a new layer and softly brush that in. Grab some of the moss we created earlier and add some to the temple as well using the layer mask.
Step 9
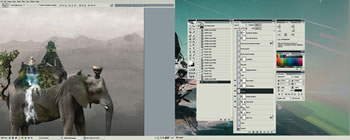
Now put a couple of objects on top of the elephant’s head to add a fun element to the piece. I used a kiwi bird and a bongo drum. Cut them out and drag them into the document. Add two new layers beneath for the shadows, and with a soft small brush at about size 25/30, brush in some shadow for each object. Add layer masks to the shadow layers in case you want to add or erase parts later on.
Step 10
Now add some flags so open flag.jpg, cut it out and drag it in. Position and rotate the large one first and add a new layer for some shadow where it appears to be coming from the temple. Duplicate and scale down the flag layer and adjust the hue to get a yellow colour, then create a shape that looks like a hole for the bongo, and make a layer mask on the flag layer and erase part of it so it appears to be standing inside the bongo.
Step 11
Now is the time to add some detailing in the form of foliage. Find some suitable images, and open leaves.jpg. Cut out what you want and drag them in one by one positioning them in different places over the top and behind the elephant. Place some bushes down by the feet to blend the elephant in more with the background.
With leaves.jpg we can use a Layer > Layer Style > Drop Shadow because of its position over the body. Use opacity 37, distance 26, size 13 and adjust the angle to suit, also uncheck ‘use global light’.
Step 12
To make the elephant more interesting we can give it some overlaying patterns and decoration. First open mask. jpg, cut it out and position it over one of the elephant’s legs. Add a layer mask and using a large soft brush with the flow set to around 25 per cent, gently erase parts until it’s blended in nicely.
You can add an ornamental pattern to the body, so find an image and change the blending mode to suit. A pattern can also be added around the eye, so use whatever you like for this. I used a spirograph type shape and masked out the edges.

Step 13
It is important to add another dimension to the piece to give it a structural feel and also to add some more detail in the background. For this you should create your own vector shapes in Illustrator, then copy them and paste them in as a smart object and position or transform them until you are happy. Make them dark grey in colour, and use sharp angles, drawn from aspects of architecture.
Now add some atmospheric elements to pull it all together and give it some more colour. Make a rainbow by creating coloured circles on top of each other and downsize them one by one. Cut this in half and set the layer mode to overlay and change the opacity to under 10 per cent. Place in the composition. Use the smoke.jpg and set the layer mode to lighten and change the opacity to under 40 per cent. We can also add some blue and pink using a large soft brush with a low opacity.

Step 14
Vector or trace some birds and place them onto the canvas, as if they were circling around the top of the elephant. Change the opacity of some of them so that it gives the illusion of depth. Use a soft textured brush at a low opacity and create some more atmosphere as if it was cloudy or misty around some parts of the elephant, and vary the thickness of this as you see fit. Add some typography by giving it a title, perhaps a tagline with your name. Try to choose a font that fits the theme.
Step 15
We are going to create a reflection of the steps we have done so far, so copy merge (Shift+CTRL+C) the bottom half of your canvas and paste it back onto it.
Flip it vertically and lower the opacity. If it doesn’t match up, start erasing areas until it does. Copy individual elements and repeat the process, just placing them underneath the original but flipped vertically and lowered opacity. Create a new levels adjustment layer over the whole image and adjust to bring out the darker areas and give it more contrast.
Source: Digital Arts
