


This story centers on five tricks that will enhance your use of your desktop or laptop, with two networking tips thrown in for good measure.
Use Old Internal Hard Drives for Free Storage
Have an unused internal hard drive sitting around? Maybe you upgraded a laptop hard drive to a bigger capacity, or you pulled an internal drive from a desktop PC before selling it. You can put either kind back to work as extra, free storage.
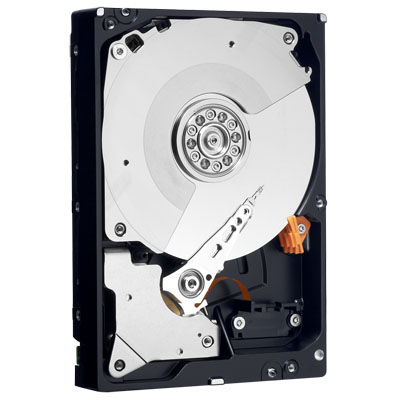
Inside a desktop PC: 2.5-inch laptop and 3.5-inch PC SATA drives use identical connections, which means that a recent laptop hard drive can work instantly.
If you want to install a laptop drive in a PC, remember that it won’t fit correctly in the regular screw mounts.
If you’re attaching it permanently, position it so that the airflow is unimpeded–stick it against the inside of the case or in a free drive bay. Secure the drive with zip-ties or removable double-sided tape. Of course, you won’t have such trouble with a 3.5-inch SATA drive, which will fit.
Then, connect either drive to a free SATA port on the motherboard (you’ll likely need a SATA cable) and connect to a plug leading from the power supply. You can add a power adapter if the only free plugs are older and too big to fit the SATA power port. If you have no free power cables, add a Y-splitter to branch off from an existing, used cable.
All of these parts are available for a few dollars.
An older ATA drive also will work in your desktop. Unlike with the plug-and-play SATA interface, with ATA you might have to adjust a jumper pin on both the extra and current drives; check your PC’s instructions or browse online for help.
A 2.5-inch ATA laptop drive needs a $10 physical adapter to attach to a 3.5-inch drive’s cable.
Connect the drive to a free power and data cable. If all the ATA interfaces are filled, consider connecting it in place of your floppy drive if that’s an option.
The Voyager S2 universal dock for internal hard drives works much like a toaster does. Just slip your drive into the Voyager S2 and connect the device to your PC.
Outside any PC: To transfer files in a pinch or use an old drive as temporary external storage, use a universal USB drive adapter cable such as one from NewerTech.
This type of cable works with ATA and SATA desktop and laptop hard drives, and it’s also great for swapping files during a computer upgrade (or meltdown). Another quick and simple alternative is to use a universal docking station like the $60 NewerTech Voyager S2. If you know how to use a toaster, you’ll know how to use the Voyager S2.
If you want to use the old drive on a regular basis but you’ve run out of ports inside your PC, you could add more ports with an upgrade card. But installing the old drive in an external case is an easier option–and as a bonus, you’ll then be able to tote the drive between PCs to ferry large files or to add storage to a laptop.
Match the physical size of the drive with the case’s specifications, and match the interface too (ATA or SATA).
Double-check, as well, that the case will match your drive size in gigabytes; an old case might not recognize all of the available storage in a newer drive. Just as in the desktop installation described above, a SATA drive should work automatically, while you might have to adjust the jumper pin on an ATA drive. The drive case instructions should show you how.
Transform Any XP Netbook Into an E-Book Reader
Rotate your netbook’s screen to get a more booklike reading experience.
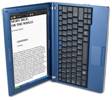
Among e-readers, the Kindle attracts the most attention due to its connection to Amazon for content and its easy-on-the-eyes E-Ink screen. But if you’re already packing an XP-based netbook in a purse or briefcase, you can get much of the same functionality without carrying another device.
You’ll need e-books (whose sales are forecast to surge in 2010) and an e-reader application to get started. Amazon’s digital titles are readable only on the Kindle and on Apple’s iPhone; and at some other stores the types of electronic books can be limited. eBooks.com and the newly launched Shortcovers.com, however, sell many current titles, their selections similar to those you’d find in an actual bookstore or sold digitally on Amazon.
Project Gutenberg lists heaps of free public-domain classics. The titles are distributed in several unprotected formats, including PDF, HTML, and plain text. After you download a book, you can read it in a Web browser, Acrobat Reader, a text editor, or any other reading application you already have.
You’ll need a special application to read copy-protected books. Either Microsoft Reader or Adobe Digital Editions, both free, can handle such files.
Now wouldn’t it be great if you could thumb through the pages vertically instead of scanning a squat, horizontal screen? You can. If your netbook has the Intel GMA Driver for Mobile Control Panel (most do), click the Display Settings tab, check Enable Rotation, and click the 270° radio button. Click Apply. Depending on your system, you might be able to press Ctrl-Alt-Right Arrow or Ctrl-Alt-Up Arrow to toggle between the normal and rotated orientations.
If your machine doesn’t have that video control panel or your key commands aren’t working correctly–mine didn’t on an Acer Aspire One–download EeeRotate. This free tool lets you easily toggle between the portrait and landscape orientations, using the same key commands noted above.
If you prefer not to hold the hardware while reading, you can have your PC read aloud books, poems, or stories saved as PDF files, via the free Adobe Reader software. Just open a PDF file in Reader and choose the read-aloud function under the View menu.
The voice is a bit mechanical and it occasionally stumbles over less common words; you’re limited to material in the public domain, too. It’s pretty effective, nonetheless.
Run Mac OS X on Your Netbook
It’s not simple, but you can put Apple’s Mac OS X on several new netbook models.

Apple hasn’t yet issued a mini MacBook, but a tiny fashion-oriented laptop would seem even more stylish if it could run the sleek Mac OS X. Good news: Many of the newer netbooks can.
The upside is that you get a trendy OS X netbook that’s perfect for Web browsing, light e-mail, and other simple, portable tasks. The downside? Certain hardware features might not work, the installation process ranges from annoying to harrowing, and by making the switch you could possibly void your warranty. Plus, you’re wading into legal and ethical issues.
Accepting Apple’s EULA (end-user license agreement) means that you agree to use OS X only on Mac hardware. You break that agreement as soon as you install Apple’s software on a non-Apple netbook.
Additionally, many of the netbook installation methods discussed on the Internet rely on a pirated, hacked version of Apple’s OS with updated hardware drivers. It’s illegal to download OS X for this project–so don’t do it. Also, you should be uncomfortable with the potential for hidden surprises lurking within pirated software.
What’s to stop a nefarious hacker from inserting code to log your passwords?
Using the Apple disc and a little minor trickery, I was able to get my legally purchased copy of OS X to run on a Dell Mini 9 netbook whose original OS was Ubuntu Linux. The general process of getting OS X to run on a PC (explained in detail at Gizmodo) relies on a bootloader disc or USB drive. The bootloader primes the system to recognize the OS X installer, which runs from an external USB or DVD drive.
Depending on your specific netbook, the setup can be finicky. The Dell Mini 9 was the netbook on which I had the most success with the OS X-disc installation–it does okay as long as it has 8GB of memory–while most other netbooks would work only with the pirated download. Even after a successful installation, Wi-Fi, ethernet, audio-in/-out, sleep, and certain other features might not work properly. (You might want, or need, to replace certain netbook parts to enable those features.) For more details, see this hardware-compatibility issues chart.
All told, the process, not to mention the uncertain results, are un-Mac-like. But the lure of forbidden fruit is hard to ignore.
Protect Your PC With a Hard-Drive Password
A user-account password is important for security, but it’s useless if your PC is lost or stolen; a thief could just install your hard drive in another PC instead of trying to boot it up under your name. To block access, add a password to the hard disk.
This process is simpler than encrypting the hard disk, but it can’t match encryption’s level of security. (Encryption scrambles data so that even if a thief gains access, he probably can’t make sense of it.)
Think of this action as adding another strong lock.
When prompted at boot, press the key to enter your PC’s BIOS (often it’s Esc or a function key). Your BIOS menus and names will vary, but the process will be similar. On the Phoenix Technologies BIOS found on many PCs, use the arrow keys to navigate to the Security tab. Press down to highlight HDD Password, and press
Enter. Type in the password, being sure to remember it or store it in an encrypted password utility–if you lose the password, recovering the data could cost a lot of money.
Follow the on-screen commands to exit and save your changes. Now whenever you start the PC, you’ll see a prompt to enter the HDD Password first. If you want to remove the password later, return to the BIOS. Revisit the HDD Password setting, enter the current password, and leave the new-password field blank.
Networking Tricks
Sling Files to Other PCs Over Bluetooth
If your laptop has built-in Wi-Fi, there’s a good chance it can also network through Bluetooth. Wi-Fi, ethernet, and other connection methods transfer files more quickly than Bluetooth does, and those networking technologies are better for recurring connections (such as in an office network).
But Bluetooth is my secret winner for slinging small files directly–and almost instantly–between any two desktops or laptops that have Bluetooth capability.
It’s especially handy at my house, where we can’t print to an ancient printer with our Vista PC (no drivers); we shoot the document to our XP laptop, which can. If a PC you use doesn’t have Bluetooth built-in, you can add a USB dongle to gain the feature.
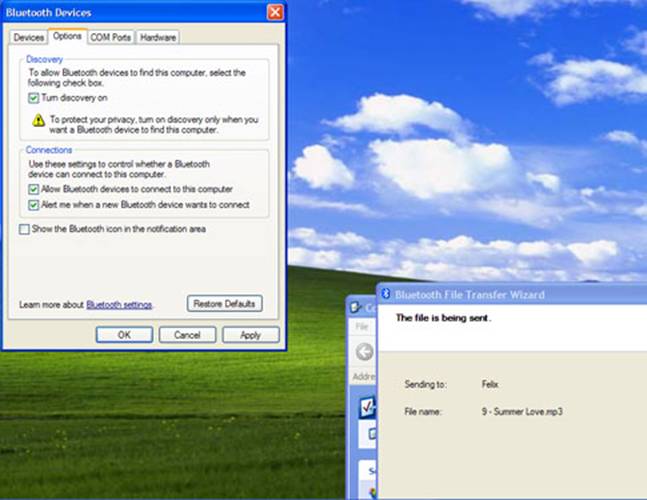
To begin, on the recipient PC, open the Bluetooth Devices control panel, click Add Wireless Device, Choose the Options tab, and click Turn discovery on. Click OK.
On the sending PC, locate and right-click the file you want to transfer. Select Send to, Bluetooth device. Click Browse if needed, and select the recipient PC. Click OK. If you’re sending something private, click the Use a passkey box and type a password. (Skip this step if you want to keep things simple.) Click Next.
Here’s what you see on your screen when you need to pair two PCs to transfer information via Bluetooth.
The recipient PC will prompt you to enter the password (if necessary) and accept the transfer. Now you just have to wait for the file. Keep transfers to a couple of megabytes or less, since files of even that size can take several minutes to transfer.
Make Info on Your Home NAS Available Anywhere
Network-attached storage is great for sharing files between connected PCs. But most NAS devices let you access your files over the Internet, as well. Some NAS devices use FTP for this purpose; others rely on a proprietary Web service. And many (such as the Western Digital My Book World Edition, pictured here) offer both.
A Web service is simpler to set up and use; in such an arrangement, you download files through a designated Web site connected to the NAS. Check your documentation for help with this method; you’ll likely need only to turn it on and make a log-in account.
Setting up an FTP server requires you to know networking basics, but anyone can connect through FTP to make the disk appear within the Windows desktop. First, make sure that your NAS hardware is running; if it isn’t, follow its standard setup process.
This Western Digital NAS device uses both FTP and a proprietary Web service to connect to the Internet.
You’ll be accessing the NAS in a browser, so you need to know its IP address. If you know it, type it as a URL, as in http://192.168.0.100, into the browser’s address field.
If you don’t know it, visit your router’s configuration page by entering the router’s IP address as a URL into the browser. If you are unsure of that URL too, open your PC’s Network Connections control panel. Double-click the current connection, and click the Support tab. Your router’s IP address is the same as the Default Gateway.
In the router-configuration page, look for a table of attached-device IP addresses. (For a Belkin N1 Vision, for example, it’s in the DHCP Client List tab.) Enter the NAS IP address into a new browser window. In the NAS-configuration page, you have to enable the FTP server. Consult your documentation; on a Buffalo Link Station, I found the setting on the Network tab.
Back on the router page, configure it to reserve the same address for the NAS drive. Many routers allow you to view a table of connected devices and click a button there to reserve the address. In my case, I clicked Lan Setup, Lan Settings and set the Lease Time to Forever. (Even with a dozen devices on my network and occasional visitors, I have ample free addresses.)
Now you need to set port forwarding. On the Belkin router I used, port forwarding was under Firewall, Virtual Servers. FTP forwarding is a common preset; I selected FTP Server from a drop-down menu and entered the NAS internal IP address. When an Internet PC tries to make an FTP connection to the router’s IP address, the router will send it to the NAS device.
When you’re outside your network, use the home router’s IP address to connect. Open Start, My Network Places. Select Add a network place. Click Next, and select Choose another network location. Click Next. Enter the home network’s IP address, in the format ftp://ftp.xxx.xxx.xxx.xxx. Finish the rest of the wizard’s settings, including your FTP log-in and password, which you can configure on the NAS device.
Note: You’ll be making these connections without any encryption, so be careful about what you transmit.
Zack Stern once disassembled a laptop at a wedding to make a complicated upgrade. Based in San Francisco, he frequently contributes to PC World and many other tech publications.
Source: PCWorld.com
