


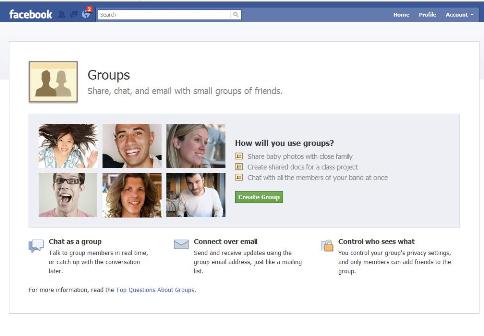
Facebook unveiled yesterday a new feature on its site that lets you share, chat and e-mail with small groups of friends.
Groups, which differs from another feature with the same name, is designed for a small number of people who know one another–think families and coworkers. Here, you can share pictures, comments and articles privately with only the people in the group. The former group pages, which targeted large communities of people with a common interest, will still be active.
[Want more tips, tricks and details on Facebook privacy? Check out ITBusiness.ca’s Facebook Bible]
In the announcement, CEO Mark Zuckerberg said that Groups were developed to combat “the biggest problem in social media”: sharing everything with everyone, when you really only want to share something with select people. “‘Just friends’ was the most private setting,” Zuckerberg said. “But you might not want to share something with hundreds or even thousands of friends.”
Here’s how to get started with Groups and details on its three main features.
1. Where to start
On the left navigation of your Facebook page is a link to Groups (if it’s not visible, choose More). Clicking this will take you to a homepage displaying the groups that you have joined in the past. You are not yet able to access the new Groups page from here; instead, you must visit the Groups landing page at http://www.facebook.com/groups.
Click “Create Group” to begin. If you’re creating a group for family members, for example, name the group accordingly. Then begin typing the names of the people on Facebook that you want in the group. You can also change the icon that you associate with the group by clicking the drop-down menu next to Group Name.
Note that the default privacy setting is Closed–this means that the members of the group are visible, but everything that anyone posts is hidden to those outside the group. Additional settings are Open, in which all content is public; and Secret, in which both members of the group and content are private. Click Create to finish the setup.
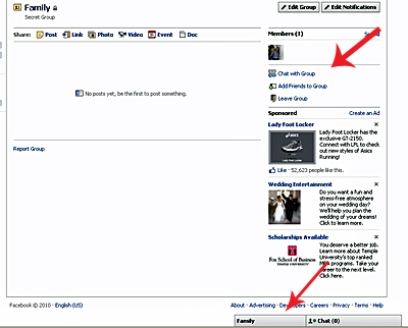
2. Group Chat
Another new feature to the new Groups is Group Chat. The difference between Group Chat and Facebook’s other Chat feature is that the conversation you have in the pop-up window are accessed and seen by those members in the group, (rather than just the one person you’d chat with otherwise). So if you do enable this, remember: No bad-mouthing one family member while chatting with another in the group.
Group Chat can be found in two places. You can initiate a chat session by clicking the link “Chat with Group” on the right side of the Group page, or if you’re not visiting the group page you can find it on the bottom toolbar next to the original Chat feature. If you’d like to remove Group Chat from your bottom toolbar, hover over it and click the X
 .
.
3. Creating documents
The second new feature that Facebook incorporated into Groups is the ability to share documents. Note that you are not yet able to upload documents you have stored on your computer such as Word documents or Excel spreadsheets; you are only able to create new documents.
Document formatting features are limited: You can bold and italicize text and create bulleted and numbered lists. The documents you create in Groups can be accessed and edited by everyone in the group.
[Optimize your privacy settings: Download the ITBusiness Facebook security and privacy setting guide]
4. Choosing an E-Mail address for the Group
The last unique feature to Facebook Groups is the ability to create an e-mail address that you can use outside Facebook to contact the group’s members. When you send an e-mail to your group’s e-mail address, the contents of it will appear on the group’s wall. Only Group administrators can access this feature.
To begin, click “Edit Group” on the top right side of the Group page. Then, click “Choose for Group” next to the e-mail address option. Choose an available address that best suits the list; Facebook will tell you if that e-mail address has already been chosen. Your group’s e-mail address will have the @groups.facebook.com extension.
5. Your Notification settings
If you become a member of a larger, more active group, you might want to edit your notifications to cut down on noise. On the group’s homepage, click “Edit Notifications” at the top right of the page. Here you can choose when you want to be notified–when a member posts or comments, only when a member posts, when a friend posts or never. You can also choose if you want notifications e-mailed to you.
If you want to change the settings for e-mail notifications on all of the groups of which you are a member, go to Account > Account Settings > Notifications > Groups > Change e-mail settings for individual groups.
Kristin Burnham covers Consumer Technology, SaaS, Social Networking and Web 2.0 for CIO.com. Follow Kristin on Twitter @kmburnham. Follow everything from CIO.com on Twitter @CIOonline. Email Kristin at [email protected].
